Wednesday, November 30, 2011

The Pie That Will Make You Cry

There's a joke in my family that once you eat a big holiday meal, it's often necessary to "go and cry." The joke roots from a story of my Uncle Bobby who once ate so much that he had to drag himself to his bed and just cry it out until his stomach felt better.

I often feel this way after Thanksgiving, and this year was no exception. We usually have a pretty rigid menu on Thanksgiving because we're so attached to the tried and true dishes, but mom went all out this year and got all adventurous on us, making italian sausage stuffing and a pear harvest salad—everything was absolutely incredible! 


So following suit, I decided to make my first pecan pie ever! I'm generally not a huge pie person (where's the icing??) but pecan pie has just enough sugar to keep my sweet tooth satisfied. 


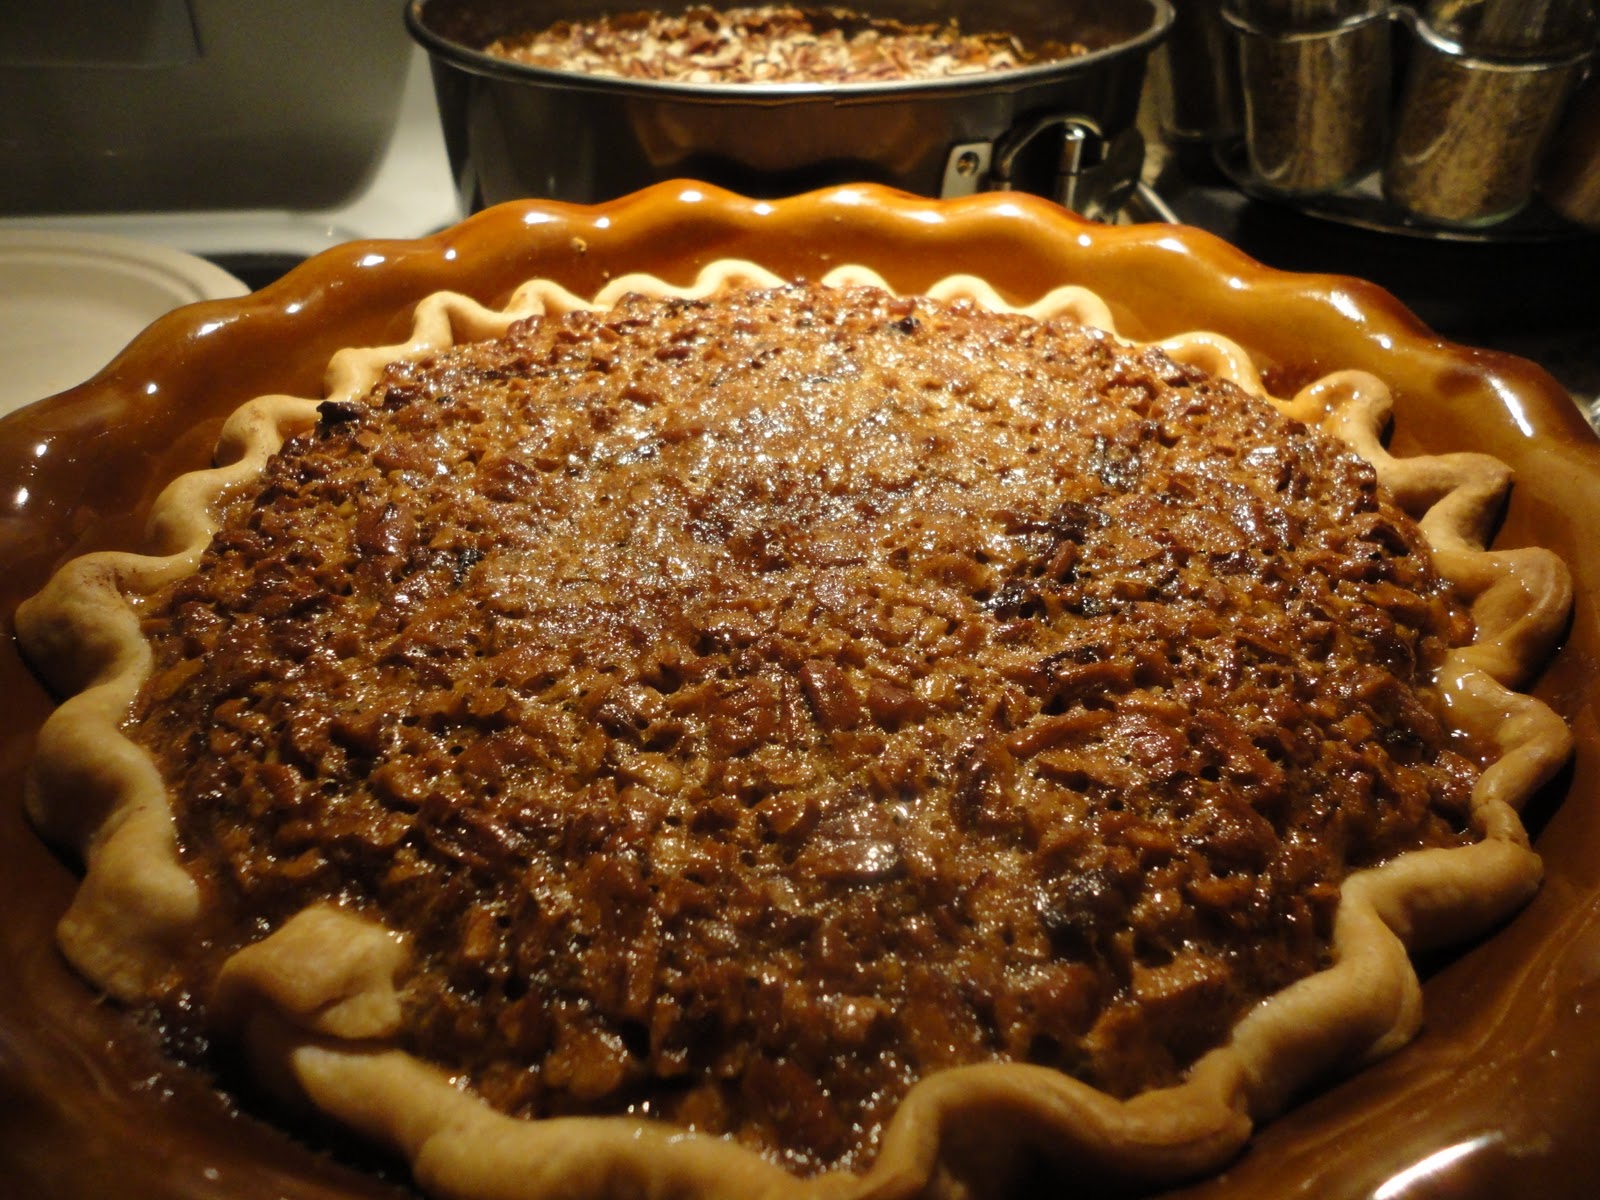
And if you're turned off by big nuts, keep reading because these ones are little enough to give a nice crunch without being overpowering. I spotted this recipe on Pioneer Woman and am absolutely in love with it. It was beyond delicious. And so easy. Especially if you use refrigerated pie crust. 
 
Are you sold yet? Because you need to make this pie for Christmas. 

Pecan Pie (AKA The Pie that will
Adapted from Pioneer Woman

Ingredients:
  • 1 whole Unbaked Pie Crust
  • 1 cup White Sugar
  • 3 Tablespoons Brown Sugar
  • 1/2 teaspoon Salt
  • 1 cup Corn Syrup
  • 3/4 teaspoons Vanilla
  • 1/3 cup Melted Butter (salted)
  • 3 whole Eggs Beaten
  • 1 cup Chopped Pecans
First, take your refrigerated pie crust out of the fridge and let it sit on the counter for 20 minutes. And preheat your oven to 350. Next, Chop your pecans nice and small. You don't need to pulverize them, but chop them up good. Mix sugar, brown sugar, salt, corn syrup, butter, eggs, and vanilla together in a bowl. When your pie crust is pliable, flute it nicely in a pie pan. 


Pour chopped pecans in the bottom of the unbaked pie shell.


From there, pour syrup mixture over the top. 


Within just a few seconds, the little nuts will rise to the top like magic. You'll see these cute little bubbles rising and popping at the surface too. Wait until it looks like this before you pop it in the oven. You may want to cover the edges with a little foil or a pie shield.


Bake pie at 350ยบ for 25-30 minutes. Remove foil/pie shield then continue baking for 15-20 minutes, being careful not to burn the crust or pecans.

Note that the baking time for this pie varies quite a bit. You'll need to keep an eye on it. When you think it's done, shake it around a bit. It should not be overly jiggly!

Allow the pie to cool for several hours or overnight. This is not the kind of pie that tastes awesome very warm. You will definitely want some time to chill it in the fridge. 


And for your viewing pleasure, a few photos from Thanksgiving... 

Saturday, November 19, 2011

Blissful Baking Beginnings. And Mini Cherry Cheesecakes

There came a point in my life when I realized that I wasn't like other people. Maybe it was when one of my friends pointed out that polishing off an entire carton of caramel swirl ice cream in two days wasn't normal. Or when I found myself spending hours reading food blogs. Or perhaps when I started wanting cookbooks more than clothes. That was a big day for me. 

Somewhere along the way I realized that I I loved food far more than most. Sometimes I wonder why I couldn't have been passionate about something else—like running for example. People tell me that they love running all the time—what's with that? But I've decided to embrace this love because it brings joy to me as well as to people that I love.

Most mornings I wake up feeling like I'm the luckiest girl in the world! I grew up in Baltimore, Maryland in an amazing family. My dad is probably the best man that ever lived. And my mom is infitinely talented. I owe her a lot because she taught me to never be afraid to try new things. Like starting this blog for example! I have one sister, Brooke—and it's always been just me and her. We're alike in a lot of ways, but she's always been a little more adventurous, and I love that about her. 


I grew up with a really awesome core group of girlfriends—they're cute little country girls and I absolutely cherish them. 


And my husband—marrying him was the best decision of my life. I can't even begin to tell you how much I love him. So much so that I call him Lover. We fell in love at BYU, had a fairytale wedding and spent our first year of marriage in Utah where we graduated together. We ended up in Charlottesville, Virginia where he's attending medical school. We're loving this city more and more every day!


I graduated from Brigham Young University in 2011 where I studied communications and now do marketing for a real estate company called CBRE. I spend my free time shopping at antique stores, baking, doing pilates, pouring over cook books, going to church, surfing the blogosphere and exploring fun restaurants in Charlottesville with my husband.

I will always have a picture to accompany my recipes. I cannot guarantee it will be a gorgeous one, but I will have one! I'm a visual person, and have never had the guts to try a recipe that I can't visualize. I will be posting lots of fresh bread, decadent brownies, sweet frostings, creamy cheesecake, cheesy pasta—and once in a while, something healthy and low calorie!


This blog will serve several purposes—it will be a record of my life and an online recipe book—but will also my creative outlet. I love sharing my favorite recipes with all of you! 
Welcome to Blissful Baking! And now for my first recipe! Mini Cherry Cheesecakes!

These babies are tried and true. A one-bowl-wonder! Perfect for bridal or baby showers, pot lucks, you name it. They look gorgeous and taste delicious, and you don't have to slave in the kitchen all day! I guarantee that if you try these, they will be going into your rotation. 


(Photo above courtesy of my talented friend Erin Ferry. You need to check her out!)

Mini Cherry Cheesecakes 

Ingredients:
  • 18 foil cupcake liners 
  • 3/4 cup sugar  
  • 18 vanilla wafers  
  • 2 packages cream cheese, softened (you can go 1/3 less fat if you want, but never fat free!) 
  • 2 eggs 
  • 1 tbsp lemon juice  
  • 1 tsp vanilla
  • 1 can cherries
Now this is so easy you won't even believe it. Preheat oven to 375. Line a cupcake pan with foil liners. Place a nilla wafer in each one. (Note: the wafer will not fill the entire liner, and that's okay)

Combine ALL ingredients in a large bowl and beat on medium for a few minutes with an electric mixer until light and fluffy. Pour into foil liners until about 3/4 full.

Bake for 12-15 minutes, keeping a very close eye on them! You do NOT want them to get even the least bit brown. You want to preserve their beautiful pure color and delicate creaminess. Remove from oven and let cool. (I usually stick them in the fridge shortly after) Chill for a couple of hours or overnight.

Top with each with a spoonful of cherries. I usually do three. Go light on the syrup.Stick them back in the fridge until ready to serve. Cheesecake always tastes best cold! Yum. Enjoy! And visit Blissful Baking again soon!